This tutorial is not 100% complete.
I will be updating this with pictures
and more details later specifically related to content folder placement.
Hello all; unlike Grand Theft Auto V,
Call of Duty: Advanced Warfare is a two disk game that is fairly easy to install.
However, since GamTec is open to anyone,
some may find this tutorial helpful in getting the game properly installed.
Click Here to Buy Premium for Rival Gamer!
Once you've bought premium, Click Here to Download
COD Advanced Warfare
(Only For Premium Users)
This tutorial is sorted by the type of download you acquire.
- An ISO download in a single image file per disk; ISOs are intended to burn onto disks; therefore, you will have to convert the ISO file to either RIP or GOD format. I recommend RIP format.
- A GOD, or game on demand, is a file that goes into your content folder. You will have to use XM360 to unlock it, and then you will be able to play the game normally from the NXE dashboard. I do not recommend this if you intend on altering the game.
- A JTAG/RGH RIP, or game files, is the easiest format to deal with. This should be the end result of any game that you download that you wish to modify. Game files include all files extracted from the game; you boot the game using 'default.xex' or 'default_mp.xex' depending on if you wish to boot the game in general or the MP menu.
ISO Download
If your download for Call of Duty: Advanced Warfare is in ISO format,
you will need to convert it in order to play the game.
I highly recommend converting the game to RIP format above anything else.
Once converted, regardless of format,
you will need your disk 1 to be in RIP format so that you can transfer the needed content files.
Converting Disk 2 ISO to GOD Format
If you are converting an ISO to GOD format, it must be disk 2 that you are converting.
Regardless, you must convert your disk 1 ISO to RIP format in order to play the game (See Below).
To convert your disk 2 ISO to GOD format, you will need the program ISO2GOD.
Download For PC: ISO2GOD v1.3.6 | Team Xecuter
Download For Mac: http://iso2godformac.com
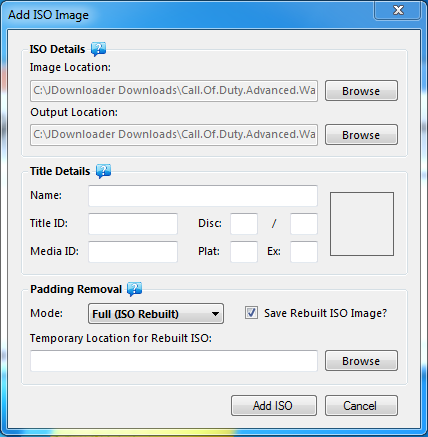
Open up ISO2GOD, and load your ISO.
Add your input and output. Input will be your ISO, and output will be where the GOD will go.
Make sure that you have a designated folder for output, and start the extraction.

The process shouldn't take long. Once done, place your AW content folder into your content folder on your console via FTP or USB in the following location:
Content/0000000000000000/41560914/*Disk 2 GOD Folder Here*
Notice! Make sure to unlock it if needed in XM360!
Converting Disk 1/Disk 2 ISO to RIP Format
Your first step should be converting Disk 1 to RIP format, as that is required to do no matter what.
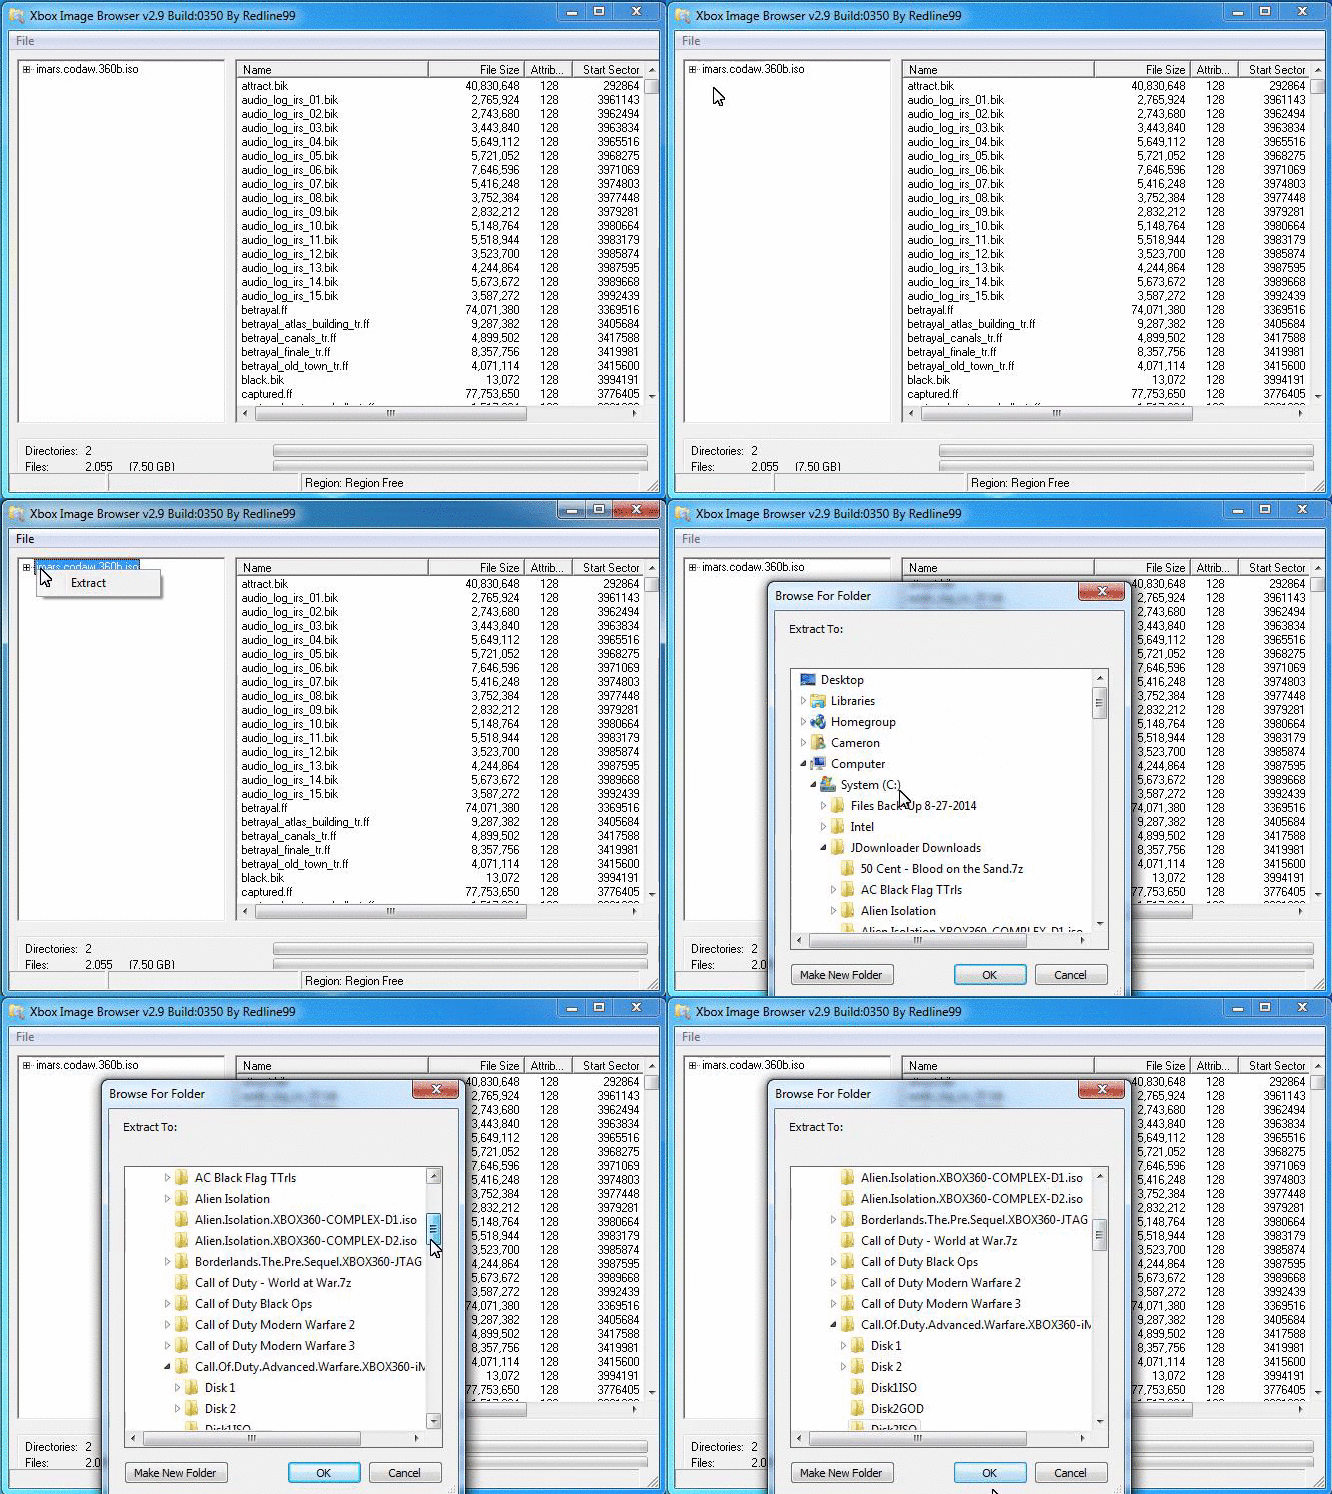
You will need Xbox 360 Back-Up Creator to do this conversion.
Click "File" and then "Open Image."
Once you have opened your ISO image, you should see your game files on the right.
Minimize the tabs on the left all the way, right click the text, and click "Extract Image."

Make sure that you have a designated folder for output, and start the extraction.
GOD Download
If you are downloading this game in GOD format,
you likely only have Disk 2 and/or you have both disks with the Disk 1 content folders already in RIP format.
For Disk 2, simply follow the instructions below that are copied from my previous instructions:
place your AW content folder into your content folder on your console
via FTP or USB in the following location:
Content/0000000000000000/41560914/*Disk 2 GOD Folder Here*
Notice! Make sure to unlock it if needed in XM360!
RIP Download
If you have a RIP download, you do not need to do anything special.
You should have the game files for both disk 1 and disk 2.
Move the game files for disk 2 into your 'games' folder within your console.
This is the game disk, and the disk that you need to boot before playing.
Your last step is simple: go into your disk 1 files, fine the content folder
, open it, open the zeroed out folder, and move the remaining folder to the same location on your console.
Here is the order of what it should look like:
Content/0000000000000000/41560914/00000002/*Two Files Here*
__________________________________________________________________________
For those people that don't want to read.
Here is a youtube video on exactly what it says above.
You are now ready to play Call of Duty: Advanced Warfare!